Places Visited Heatmap
I had a list of cities, addresses, landmarks etc. visited by me over the years and I was looking into ways to visualize those. During my search, I came across Google Maps JavaScript API which not only visualizes location data but also has ways to show places which are visited more often than others. But the API needs location data in a specific format with latitue and longitude coordinates in a JavaScript along with weightage for each.
This project is to convert my plain text cities, addresses, landmark etc. data to geographic coordinates and assign weightage to each location. Once I have that, integrate the data with Google Maps to visualize.
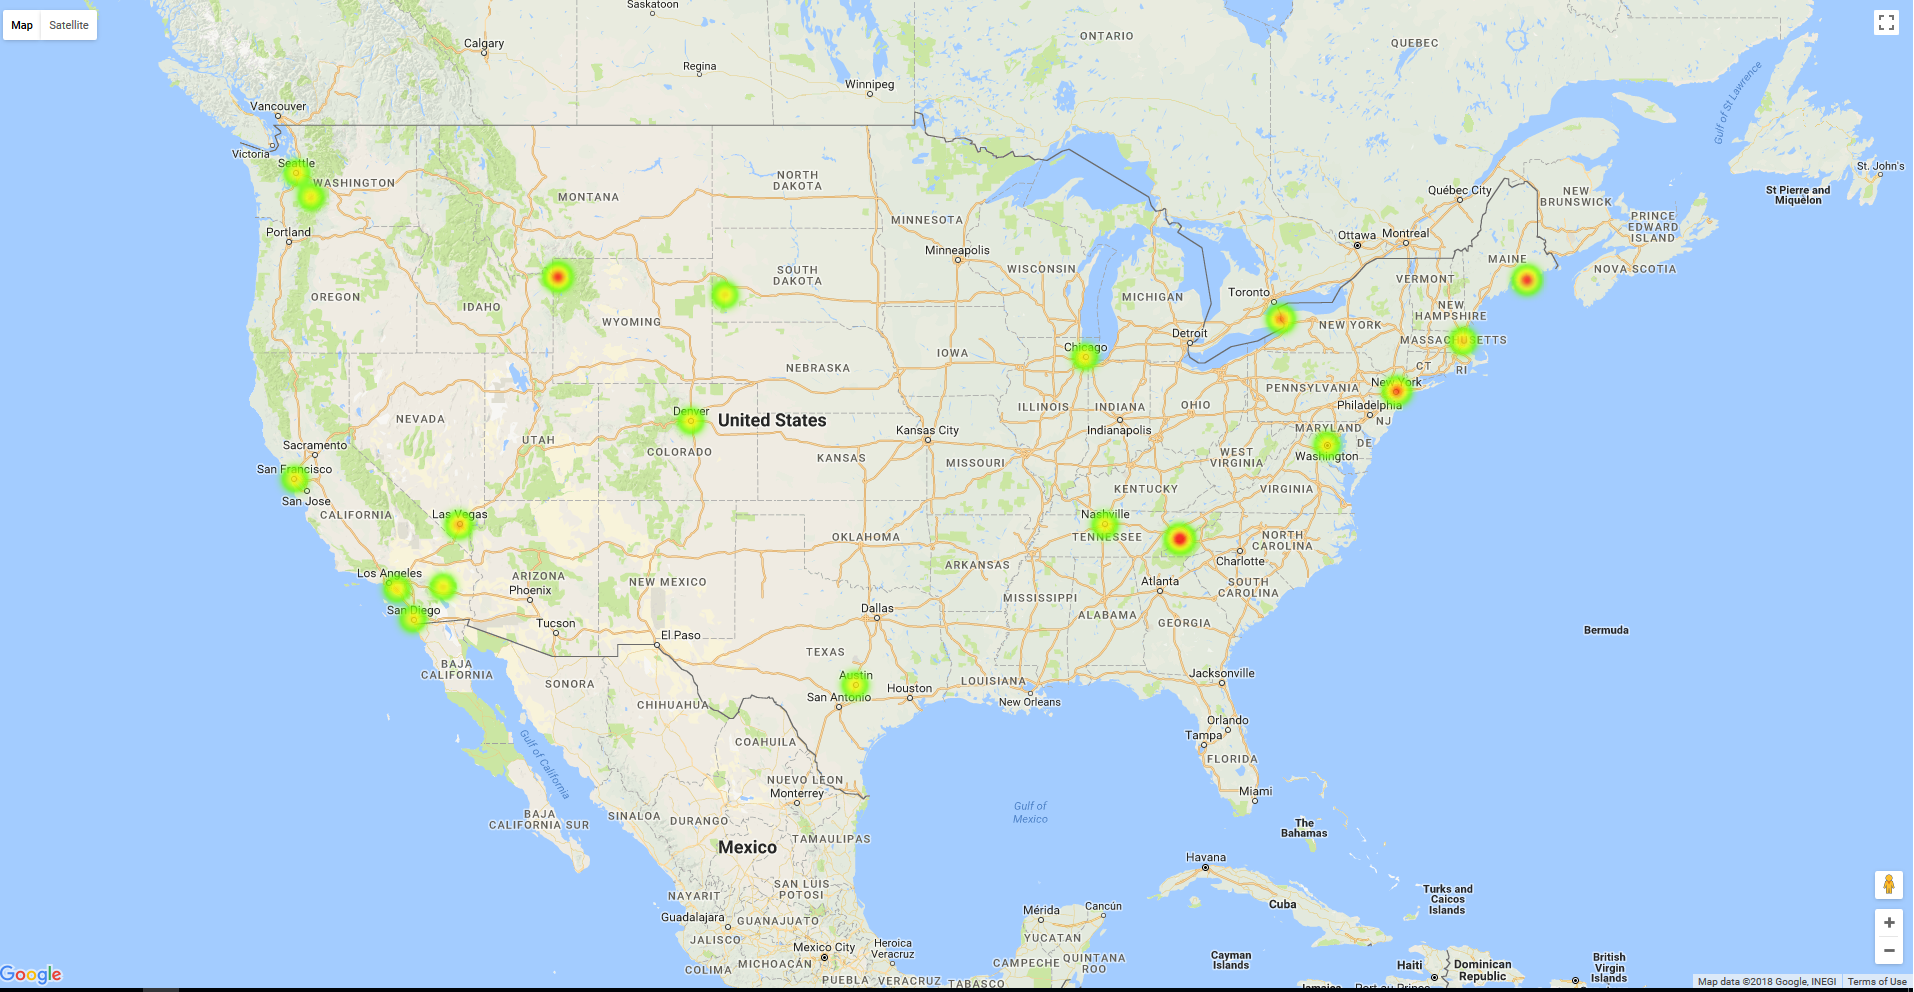
Our end result will look like below. This is generated with a smaller set of test data. Complete project is available in my Github places-visited-heatmap
Let’s get started.
Google API Keys
To start with, for both retrieving geographic coordinatesa nd visualizing data, we need free Google API Keys, actually two different keys as - for Geo operations we need “Google Geo API Key” for retrieving geographic coordinates and “Google API Key” for visualizing. To get the keys, all you need is a Google account.
“Google Geo API Key” - developers.google.com/maps/documentation/geocoding/get-api-key
“Google API Key” - developers.google.com/maps/documentation/javascript/get-api-key
Convert Data
Once you have API keys, we can get started with converting plain text data to geographic coordinates. I am using Go to implementing data transformation.
My input data is going to be a text file with location details. Something like below.
Niagara Falls, NY
San Francisco, CA
Empire State Building, NY
Acadia National Park, Bar Harbour, ME
I open this file and start scanning using bufio. I also create two new output files - locationlatlng.data to write location data with geographic coordinates, if you are just interested in only converting data and also places_data.js which will be a JavaScript file with location data which will be used by Google Maps JavaScript API to visualize data.
//Read Input File with Locations Data
fileWithLocationData, errReadingLocationData := os.Open("../data/location.data")
handleFatalError(errReadingLocationData)
fileWithLocationDataScanner := bufio.NewScanner(fileWithLocationData)

//Create file to write output delimited data
locationDataFileWithLatLng, errWritingFileWithLatLng := os.Create("../data/locationlatlng.data")
handleFatalError(errWritingFileWithLatLng)

//Create file to write output JS for Goolgle Maps Rendering
jsDataForHeatMap, errWritingJSDataForHeatMap := os.Create("../ui/places_data.js")
handleFatalError(errWritingJSDataForHeatMap)
Once the input location.data file is scanned, we can start reading line by line and process using Geocode API. We will be sending Google geo API key along with the data from input file to the web service and process response JSON to retrieve data corresponding to input. To process JSON we will use this excellent library gjson which helps in parsing response JSON.
From response JSON, we will be reading formatted_address, address_components which will be primarily used only for the output file and not for visualization JavaScript. For visualization, we will be reading geometry.location.lat & geometry.location.lng (which will also be written to output file)
//Read Google API Key
googleAPIKey, errReadingAPIKey := ioutil.ReadFile("../data/googlegeoapi.key")
handleFatalError(errReadingAPIKey)

//Build Web Service URL
googleAPIBaseURL := "https://maps.googleapis.com/maps/api/geocode/json?key=" + string(googleAPIKey) + "&address="

//Call Web Service
googleAPIConstructedURL := googleAPIBaseURL + url.QueryEscape(fileWithLocationDataScanner.Text())
response, errFromAPI := httpClient.Get(googleAPIConstructedURL)
handleFatalError(errFromAPI)
responseBytes, errFromReadResponse := ioutil.ReadAll(response.Body)
responseString := string(responseBytes)

//Process response from service
formattedAddressArray := gjson.Get(responseString, "results.#.formatted_address")
for _, formattedAddress := range formattedAddressArray.Array() {
    fmt.Fprintf(locationDataFileWithLatLng, formattedAddress.String()+"$")
    addressComponentsArray := gjson.Get(responseString, "results."+strconv.Itoa(indexInner)+".address_components.#.short_name")

    for _, addressComponentsArray := range addressComponentsArray.Array() {
        fmt.Fprintf(locationDataFileWithLatLng, addressComponentsArray.String()+"$")
    }
    geometryLocationLat := gjson.Get(responseString, "results."+strconv.Itoa(indexInner)+".geometry.location.lat")
    geometryLocationLng := gjson.Get(responseString, "results."+strconv.Itoa(indexInner)+".geometry.location.lng")
    fmt.Fprintf(locationDataFileWithLatLng, geometryLocationLat.String()+"$"+geometryLocationLng.String()+"\n")
Now we have all the data we are looking for, we can start building JavaScript data for visualization. If you remember, I was mentioning about assign weightage to each location on how frequent it appears in our input. Which basically means, if I visited location A three times and location B one time, in the map we should show location A with high intensity. That’s done by assigning weight to every location.
Let’s start by creating a struct to hold our data for visualization. We need latitude, longitude and weight.
//LocationHeatMapData - Data structure to hold heat map data
type LocationHeatMapData struct {
    Latitude, Longitude string
    Weight              float64
}

//LocationHeatMap - Data structure to hold LocationHeatMapData
type LocationHeatMap struct {
    LocationHeatMap []LocationHeatMapData
}
Now, we have to start loading geographic coordinates data from response JSON to our LocationHeatMapData struct. We will use a constant weight of 0.5 for every location we add. If same geographic coordinates already exists in LocationHeatMapData, then we will increment weight by 0.1. So, more frequently visited places will have a higher weightage compared to rest.
if len(locationHeatMap.LocationHeatMap) == 0 {
    locationHeatMap.LocationHeatMap = append(locationHeatMap.LocationHeatMap,
    LocationHeatMapData{Latitude: geometryLocationLat.String(), Longitude: geometryLocationLng.String(), Weight: 0.5})
} else {
    dataMatchIndex := checkIfValueExists(locationHeatMap, geometryLocationLat.String(), geometryLocationLng.String())
    if dataMatchIndex != -1 {
        locationHeatMap.LocationHeatMap[dataMatchIndex].Weight = locationHeatMap.LocationHeatMap[dataMatchIndex].Weight + 0.1
    } else {
        locationHeatMap.LocationHeatMap = append(locationHeatMap.LocationHeatMap,
        LocationHeatMapData{Latitude: geometryLocationLat.String(), Longitude: geometryLocationLng.String(), Weight: 0.5})
    }
}
To check for existing location in LocationHeatMapData struct we will use below function
//Function to check if Latitue/Longitue exists in data structure
func checkIfValueExists(locationHeatMapCheck LocationHeatMap, geometryLocationLatCheck, geometryLocationLngCheck string) int {
    for locationDataIndexCheck := 0; locationDataIndexCheck < len(locationHeatMapCheck.LocationHeatMap); locationDataIndexCheck++ {
        if locationHeatMapCheck.LocationHeatMap[locationDataIndexCheck].Latitude == geometryLocationLatCheck &&
            locationHeatMapCheck.LocationHeatMap[locationDataIndexCheck].Longitude == geometryLocationLngCheck {
            return locationDataIndexCheck
        }
    }
    return -1
}
Finally, we write all the data to places_data.js file under getDataPoints() function which will be used by visualization library in next section
fmt.Fprintf(jsDataForHeatMap, "function getDataPoints() { \n\treturn [\n")
for indexLocationDataWriteIndex := 0; indexLocationDataWriteIndex < len(locationHeatMap.LocationHeatMap); indexLocationDataWriteIndex++ {
    fmt.Fprintf(jsDataForHeatMap, "\t\t{location: new google.maps.LatLng("+
    locationHeatMap.LocationHeatMap[indexLocationDataWriteIndex].Latitude+", "+
    locationHeatMap.LocationHeatMap[indexLocationDataWriteIndex].Longitude+"), weight: "+
    strconv.FormatFloat(locationHeatMap.LocationHeatMap[indexLocationDataWriteIndex].Weight, 'f', 1, 64)+"}")

    if indexLocationDataWriteIndex == len(locationHeatMap.LocationHeatMap)-1 {
        fmt.Fprintf(jsDataForHeatMap, "\n")
    } else {
        fmt.Fprintf(jsDataForHeatMap, ",\n")
    }
}
fmt.Fprintf(jsDataForHeatMap, "\t]; \n}")
Visualization
Now, we should have a JavaScript file (places_data.js) like below.
function getDataPoints() {
return [
        {location: new google.maps.LatLng(36.1699412, -115.1398296), weight: 0.7},
        {location: new google.maps.LatLng(43.0962143, -79.0377388), weight: 0.8},
        ...
        {location: new google.maps.LatLng(32.715738, -117.1610838), weight: 0.5}
    ];
}
All we have to do now is to include this JavaScript in a HTML page which will load Google maps and load our location data as a heatmap on the map. For loading Google maps for heatmap visualization, we need Google API Key (not same as Geo API Key)
<script type="text/javascript" src="places_data.js"></script>
<script async defer src="https://maps.googleapis.com/maps/api/js?key=##YOUR_API_KEY_HERE##&libraries=visualization&callback=initMap"></script>
<script>
    var map, heatmap;
    function initMap() {
        map = new google.maps.Map(document.getElementById('map'), {
            zoom: 5,
            center: {lat: 40.055347, lng: -101.030931},
            mapTypeId: 'roadmap'
        });
        heatmap = new google.maps.visualization.HeatmapLayer({
            data: getDataPoints(),
            map: map
        });
        //Radius configuration
        heatmap.set('radius', heatmap.get('radius') ? null : 20);
        //Opacity configuration
        heatmap.set('opacity', 0.8);
    }
</script>
Once we load this HTML in browser, it should produce something like below. There are lot of customizations which can be done on the map. All configuration options are documented under Google Documentation. Below screenshot is a vanilla render.
Full source code for all snippets referenced in this article is available in my github page.